Friday, January 30, 2015

Instagram for Railfans

Instagram is a great photo sharing platform, and it is used by millions of people daily, including many railfans.

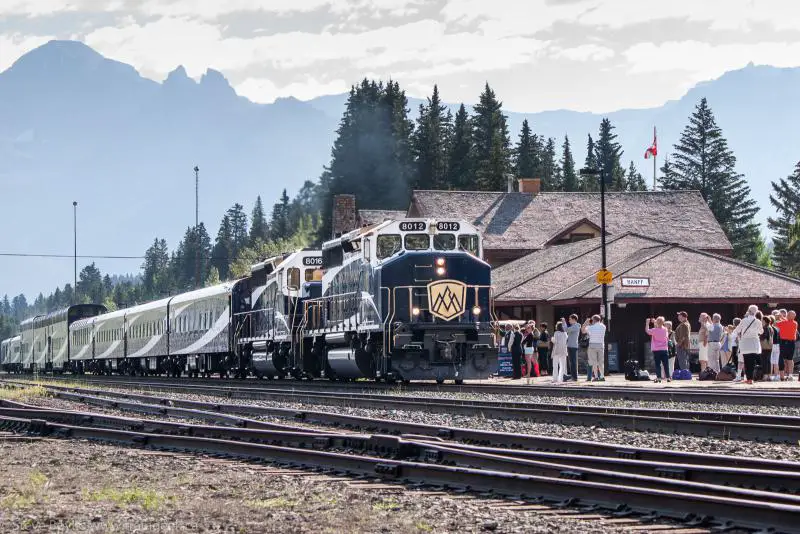
I first started using Instagram (I'm @stevetraingeek) because my daughter started using it, but soon I discovered many of my friends were already using it. After a bit of digging I found that many railfans are also using it.

Instagram was one of the reasons why I did a survey of where my readers view train photos. Only one person (out of 37) was using Instagram, which was a bit surprising to me. Now that I've used it for a while longer, I want to write about it.

Why Instagram?

Here's a few reasons why I think Instagram is a good platform for railfan photos.

  1. It's really easy to post photos. Take a photo with your phone - in or out of the app - apply a filter and some text, submit and you're done.
  2. Many Instagram users are young - think teenagers - so you can reach a different audience than more traditional photo sharing sites.
  3. Hashtags make it easy to find related photos.
  4. It's just fun!

The Basics


First off, you need the app installed on your phone. It's available for iOS devices like iPhones as well as Android based devices, and third-party support is available for some other devices. You can view Instagram photos using a computer (here I am) but you can't post anything.

Once you have it installed, you log in and go through the registration process. When you're done, you have a profile.

As you can see, it is totally image based. You can't post text at all unless it's embedded in an image. Believe me, people do that - think Facebook-style memes.

The five icons across the bottom provide navigation. The house is the "Home" button to show the stream of images from those you are following. The magnifying glass is the search button and the middle camera button is to take a photo (more below). The heart icon shows a list of people who liked or commented on your images. Finally, the head-and-shoulders icon shows your own profile, as I show on the image to the right.

Hip to Be Square

One thing that I still struggle with is that images on Instagram are square. Your camera, be it a DSLR or a phone, does not take square photos. My camera's aspect ratio is 4:3, meaning images are wider than they are tall. Instagram photos are 1:1 so you will have to crop the side(s) off your photos before posting them. This presents interesting challenges for composition and in fact some of my photos are just unsuitable for Instagram because I would cut out some interesting part(s) of the photo. It is what it is.

Uploading Images

As I mentioned, the center icon is for taking and uploading photos. When you press it, your camera is switched on and you can take a photo from within the application. You also have the option to use a photo from your photo library by pressing the photo to the left of the big blue shutter button, and you can also take a video using the camera on the right side. Videos in Instagram can be no more than 15 seconds long at the moment.

Personally I edit my photos in Lightroom and upload them to my iPhone with Dropbox. I do that because I'm more comfortable with editing on my PC, plus I want to apply a watermark with my copyright information. Photos get shared a lot on Instagram and I want to ensure it's known where it came from.

Whether you take a photo inside Instagram, or use a photo from your library, you can edit it within the app by applying one of the filters provided, or by manually tweaking the photo's contrast, warmth, saturation, etc. Once the photo looks the way you want it to, you can add a caption (and hashtags), tag people, add a location, and optionally share to a number of other social services like Facebook, Twitter, Tumblr and Flickr.

The process is quite easy and takes no more than a minute once you're used to it.

Viewing Images

Instagram presents images from those you are following in a single column of images (with captions), with the newest first. You can flick your finger to scroll through them quickly. Double-tap on a photo to "like" it, or click on the Comment button under the photo to leave a comment.

The photo at right is from @bigjdme, a fellow Winnipeg railfan who likes graffiti on trains. You can see the metadata under the photo includes who liked it, some hashtags that bigjdme added, and the comments from users.

All of the blue text are links. Poke a hashtag and you search Instagram for other photos tagged with the same hashtag. I'm still getting the hang of hashtags so I typically don't apply them. A user recently asked me to tag my photos with the railroad and engine number (e.g. #CN2525) and I'll probably do that.

What it is Not

Since being acquired by Facebook in 2013, I think Instagram has tried to become more social. It is, in a way, but the fact that you can't post just text limits it in that way. I'm OK with that - I already have Facebook.

It's not a good place if you have reasons to keep your stuff private. Almost everything on Instagram is public. People can see who you are following, and who follows you. You do have the ability to send photos directly to one or more users but that's the only private function I'm aware of.

It's not a rigorous railfan photo sharing site like Railpictures or RRPictureArchives.NET. Hashtag searching is fine but there is no organization to help you find photos of a particular railway, locomotive or model.

Recommendations

If you have a phone that supports Instagram, why not give it a try? Please follow me (@stevetraingeek) and I'll follow you back. Other users you might consider following include @a_railfans_life, @bcrailfan, @conductor_diego, @crwentzphoto, @manitoba_railfan, @ontario_railfan, and @thedavison_railfan among many others.

PS If you haven't already, please consider joining my mailing list to be informed of new material on my web sites and early access to some new stuff coming down the pipe. Thanks!

Read More


Wednesday, January 28, 2015

Survey: Product Development

CN 2845 in Winnipeg, January 15 2015
Could you please help me out by taking a survey? I'm considering some future projects and I'd like your input on what you would like to see. I'm considering videos and eBooks and maybe some online photography training. Your input will help me decide what to focus on first.

I haven't had a lot of products for sale. I had/have my train and grain elevator calendars for sale for a couple of years, and of course I have prints for sale. My store lists both.

Beyond that, I used to sell a VIA in the Maritimes DVD for the New Brunswick Railway Museum but I haven't offered that for years. They may still sell it in their gift shop - I don't know. I tend to shy away from mailing products myself, because I must confess that I am really bad at mailing things. I put them off for some reason and I am frequently late. It's better that someone else handles the mailing!

I'm working on a VIA Rail Chaleur video. I have footage from the 2007 and 2009 chases I did with David Morris and I'll be including maps and some still photos to round it out. I'm just waiting to digitize the rest of the 2009 chase before I can finish it.

In case you're curious, for the 2015 calendars I offered, I sold 8 train calendars and 2 grain elevator calendars for a total profit of US $42.52. The last pair sold on January 19.

Clearly I'm not making enough money to quit my day job!

One might wonder whether it is worth the effort but I like doing it to review my photos and also because people do ask for the calendars. I have the grain elevator calendar on my office wall.

If you have a few minutes, please take the survey. I appreciate it!

Sunday, January 25, 2015

The Gull

The Gull and the Acadian

I had an inquiry recently from someone whose mother and sisters took a train from Rhode Island to Nauwigiwauk, NB back in the 1920s and 1930s. I did a little digging and provided her with some information on the Gull, the joint passenger service provided by the Boston & Maine, the Maine Central, Canadian Pacific and Canadian National.

1941/04/27 Gull schedule
The Gull began on March 2, 1930 and ended in 1960. I believe it started as a dedicated train on the Boston and Maine and ended up as a set of cars (often a Pullman sleeper and a coach, from what I have read) that was passed from railroad to railroad until it reached the terminus. The intent was for passengers to not have to change cars when changing railroads.

There was a “through sleeper” service called the “Gull” that ran all the way from Boston to Halifax. http://faracresfarm.com/jbvb/rr/run_thru.html#Gull I don’t know when this service started, but if it was around in the time period you are looking at, they would have stayed in the same sleeper all the way from Boston to their destination.

More information on the Gull

Schedules:
April 1941
June 1954

Earlier named trains running from New England to Halifax were:

  • Pine Tree Acadian - The first train departed on June 28, 1929. It ran from Boston to Halifax, but it did not last long. A similarly named train, the Acadian, started in 1927 from Montreal to Halifax.
  • Down Easter - The first train was also on June 28, 1929. It ran from New York to Halifax. This is not to be confused with Amtrak's Downeaster.

Here is a consist of the eastbound Gull at Lewiston, Maine at 1:48 A.M. on Feb. 20, 1932:

  • Locomotive Boston and Maine No. 3702
  • Express
  • Mail
  • Baggage
  • Coach - 23
  • Coach - 13
  • Sleeping Car Halifax - 12
  • Sleeping Car St. John - 12
  • Sleeping Car Bangor - 22
  • Sleeping Car Calais - 24
  • Club St. John - 8

Total cars: 10, Passengers: 114

By the way, Nauwigiwauk was a station stop in 1919 according to this CN public timetable on my site. Train 18 (eastbound) stopped at 8 AM.

Note: I've had this post in "draft" status for literally years, so I decided it was time to post it. Hopefully people will comment with more information on the Gull.

Wednesday, January 21, 2015

CN Derailment in Downtown Winnipeg

There was a derailment in downtown Winnipeg late this afternoon, around 4:40 PM. According to CN's Twitter account "At ~4:40pm local time, 9 cars on westbound CN freight train derailed upright on CN main line in downtown Winnipeg. No leaks or injuries. Loaded cars contained sand; 2 derailed tank cars empty. CN crews on site, working to restore service. The cause is under investigation."

The cars in the above photo appear to be derailed. Notice how the car second from right is not connected. I noted sparks flying as crews were apparently cutting the couplers to separate them.

There was plenty of equipment and personnel in the nearby parking lot. That's the Fort Garry Hotel in the background, and you can see the dome of the VIA station above the truck cab.

There were personnel walking the train. Here I saw two people on the William Stephenson Way overpass. The end of the train is just off the right side of the photo.

Note the angle of the covered hoppers in the two photos below... clearly derailed.

Thank goodness they didn't fall off the overpasses!

I hadn't read my news this afternoon so I was totally unaware. I had headed up to the north end of Winnipeg after supper to get some video tapes converted to digital, and on my way home I noted the sparks flying from the stopped train and investigated.

Apparently CN believes the track will be clear late this evening. It's fortunate the cars were all upright and it doesn't appear that they traveled very far after derailing.

Global has helicopter video! The north track looks pretty torn up.
News reports:
Update: The CN Communications Twitter account responded to my inquiry and told me that one track was opened by midnight Wednesday night. The track is reported clear as of Friday night.


Sunday, January 18, 2015

Return to Banff, Part 2

My family camped in Banff, Alberta in July 2013. In part 1 I described a successful early morning of railfanning in Banff and at Morant's Curve. Here I complete the tale, still at Morant's Curve near Lake Louise.

After the three CP trains rolled by, there was a lull for about an hour. During that time I walked up to the small parking lot near Morant's Curve to look at the interpretive display.

At 08:18 CP 9724 started around the curve.

You can see that the sun has finally reached the track!


Here's the video:


That was exciting... but I decided it was time to head back to Banff to try to catch the Rocky Mountaineer. On my way there, I saw a bear up the hill from highway 1A. I took a couple of really long shots before continuing on.

Once I rejoined the Trans-Canada Highway, I spotted a westbound CP freight waayyy in the distance. I stopped at a scenic viewpoint and took a couple of photos of CP 8877 West.


I arrived at the station in Banff to find a large crowd of people waiting for their train. At a few thousand dollars per person, there was a lot of money spent on the Rocky Mountaineer!


They came to a stop and the passengers started boarding. It didn't take very long for everyone to get on board.

This is my favourite photo of the Rocky Mountaineer in Banff.

I like the "swoop" theme they have on their train now. Contrast that with the red-white-blue scheme they had in 2010:
Note that 8012 was the second unit in 2010, and it was the leader on the Rocky Mountaineer in 2013.

I didn't hang around to see them leave as I wanted to catch them "on the road". I took this near head-on photo and headed west.

In 2010 I had waited at Banff for the train to leave, and ended up sprinting to get a shot of the Rocky on the road. I wanted a bit more time to set up so I left before the train. I drove to Muleshoe on the 1A and parked at the scenic outlook, and headed down toward the track with my cameras and tripod.

I set up the tripod and put the Canon S3 on top, then fired a few test shots with my T1i. Given that the sun was off to the left but ahead of me, the lighting was tricky. I ended up using an exposure bias of -1.3 stops to keep the sky from blowing out. It's always a good idea, if you have time, to fire off a test shot or two and see how it looks and check the histogram to ensure it's not over- or under-exposed.

The Rocky Mountaineer rolled along and I captured this photo - exactly what I was looking for.

Compare that to 2010's photo, taken with a different camera, fog, and not as much preparation, but in the same location.

The Rocky Mountaineer was going at a good clip, as shown by the video:


Those domes look very comfortable!

That was the last train I saw in Banff. We did go up the gondolas to Sulphur Mountain, always a fun trip.

Here's a few random landscape photos to show you just how beautiful Banff is.
Cascade Ponds

Lake Louise
Moraine Lake
I can't wait to go back... maybe in 2016.

See also:


Return to Banff, Part 1


Back in the summer of 2013 my family and I went back to camp in the Banff area for a week. You may recall that we were there in 2010.

We parked our trailer at the Tunnel Mountain Campground just outside Banff proper. That was the same place we camped at in 2010 and in fact we were in the same spot. While we were there, the Google Street View car came through. My son and I were going to get water when we spotted it. I fetched my camera and took a photo of the car.

It took a photo of me, too... in my pajamas!

Anyway, back to trains. I went to the Banff station on the evening of July 16th but nothing came along.

I went out to Banff West early in the morning of July 18th, hoping to capture a train there. The light was great but there was no traffic... in the 3 hours I was there. Disappointing. (I had better luck in 2010)

Here I am pensively watching for trains.

I negotiated one more trip out, on the morning of July 21st. This time I saw trains. I went down to the Banff station about half an hour before sunrise and there was a train. CP 8929 was heading west at 05:27.

This was at 1/50s at f/1.8 with my 50mm lens.

After the train passed, I headed to the railfan Mecca, Morant's Curve, to catch 8929 there. Fortunately I arrived about 3 minutes before the train did (06:16)!

This is the CP Laggan subdivision, mile 113. There's a hotbox detector just around the corner at mile 111 (Eldon) so you can get advance warning of a train if you have a scanner.


You can see the sun was just lighting up the tops of the mountains. Technically the sun was up for about 25 minutes but of course it has to clear the mountains.

Here's CP 9722 as mid-train power.

It wasn't long until another train came by, an eastbound this time. They must have been waiting at Lake Louise for 8929 to pass.

CP 8605 East rolled past my lens at 06:35 with a big ol' grain train.


CP was clearly making up for sending no trains back on the 18th... or at least that's what I choose to believe! CP 9813 East came rolling by shortly afterward at 06:57 pulling a potash train.

Here's a view of my "video camera" aka my old Canon S3.


After that burst of trains, there was a break of over an hour before the next train came along... in the next post.

See also:

Thursday, January 15, 2015

25 Years Ago Today


It's hard to believe that January 15, 1990 was 25 years ago today. That was the day that the huge cuts to VIA Rail took effect and many routes were lost or curtailed.

I wasn't a railfan then, but I was aware of the magnitude of the cuts, at least. I know many railfans made the effort to make "last rides" on many routes - they rode the RDCs to Yarmouth, NS; the Canadian through Calgary and Regina; and many other trains that no longer run.


VIA Rail has never recovered. Periodic capital injections have allowed them to refurbish or replace aging equipment, but service has never come anywhere close to the levels it provided prior to 1990/01/15.

One could make a convincing argument that service outside the Quebec City-Montreal-Toronto Corridor continues to decline. The Canadian is rarely on time any more (and only runs twice/week in the winter); the Ocean is running only three days a week (although VIA did run extra Oceans at Christmas last year, a welcome start); and Vancouver Island's Malahat and the Gaspé's Chaleur are on indefinite hiatus.

To support passenger rail, and public transit in general, please support groups like Transport Action (formerly Transport 2000) and Le Groupe Traq. Talk to your MP and your MLA. Ride the trains!


Wednesday, January 14, 2015

Greatest Hits, Volume One

I was poking around through the blog archives recently and found a few posts that you might not have seen, especially if you're a relatively new subscriber to my blog. Here's a list of "trip reports" / stories that I wrote that you might like. I've gone through them and fixed any broken links that I found.

I hope you like them!

Tuesday, January 13, 2015

5 Quick Tips to Improve Your Railfan Photography

We railfans love to take and share photos of trains. Capturing that rare locomotive or great lashup* is a great feeling and you want to share your good luck. Before sharing that photo, however, consider these five tips to improve your photography so you can share your best photos!

* lashup/consist = combination of locomotives powering the train

1. Get On The Sun Side

So many railfan photos are shot into the sun. I know I made this mistake many times.

The frame and trucks disappear into inky darkness, or the sky gets blown out into bright white. Neither are good.

The solution? Get on the sun side.

I know that sometimes this is not possible without trespassing or being unsafe, and of course safety is always first.

If you cannot get on the sun side, at least move so that the sun isn't directly in front of you.

And if there's nothing you can do to move the sun, go for a silhouette photo instead.


2. Ban the Wedgie

OK, that might be a bit extreme, but try to vary your shots so you photograph trains at other angles than just this.

There's nothing wrong with a 3/4 wedge shot. It shows the locomotives well, but it's.. common. Easy.

Try different angles, and different composition, to make your photos really stand out. Shoot the train side on. Try a pan!

Get your camera really low - or really high (find an overpass, stand on a snowbank, or bring a ladder!).

3. Focus On The Details

Rather than show the entire locomotive, zoom in on the details. Noted author and photographer Greg McDonnell includes a lot of detail photos in his books and I think they really set his work apart.

Documenting the details really helps later on to resolve questions that people might have about "how things used to be". As railfans we are also documenting what's going on. We owe a large debt to railfans of decades past who shot the dying days of steam, the first generation of diesels, and so forth. Someday railfans will thank us who capture the last GP9s, the GMD1s, and other equipment that won't be around for much longer.

4. Keep It Clean

Good photography tells a story, and it's hard to know what the subject is when there is a lot of clutter in a photo.

Who doesn't look at that giant box on the left?
I think this needs some "post" processing...

Keep it simple. Move your feet to get rid of distracting elements.

Other elements in the photo help provide context, but the subject of your photo (in this case, the train) should dominate.

5. Edit Your Photos

Please, please, please don't post your photos straight out of the camera (SOOC). All photos can benefit from a little editing.

At the very least, you should:

  • Make sure the horizon is level
  • Get the exposure right
  • Add a bit of contrast

Here's a photo I took in June 2013, almost straight out of the camera. I cropped it but that's the only edit I did to it - so far.

Not bad.. not bad. But it could be a lot better. Here's what I see that could be improved:

  • The horizon slants a bit to the left
  • The trucks are too dark - in fact the  whole photo is a bit dark
  • The grass is a little dull for June

Here's the edited photo.

I think it has a lot more "punch".

There are plenty of photo editors out there. As long-time readers know, I love Adobe Lightroom but there are many other choices including free editors like Paint.NET, Gimp, and PhoXo. If you use your phone for photography, there are lots of editors there too including the built-in iOS photo editor.

I hope these tips help you to produce better railfan photos. Please comment below if you have more to share. I look forward to seeing your photos. Follow me on Google+, Facebook, Flickr or Instagram and let's get sharing!